how to build a waterproof keypad: A Comprehensive Step-by-Step Guide
Introduction
A waterproof keypad is a type of input device that is designed to operate in wet or humid conditions without getting damaged. It has applications in various fields including marine, industrial, and outdoor settings. The objective of this project is to guide you through constructing a waterproof keypad.
Gathering Materials
The components needed to build the waterproof keypad include:
- Keypad module
- Waterproof sealant
- Silicone or rubber buttons
- PCB (Printed Circuit Board)
- Microcontroller
- Soldering iron and solder
- Waterproof casing or enclosure
- Miscellaneous items such as wires, connectors, etc.
These components can be purchased from local electronics shops or online marketplaces like Amazon or eBay. Make sure to check for quality and compatibility of components when purchasing.
Designing the Keypad
Designing a keypad involves three crucial steps: conceptualizing the layout, determining the size and the number of keys, and creating a circuit schematic.
1. Conceptualizing the Layout: The first step is to envision how you want your keypad to look. This will largely depend on its intended use. For instance, if you’re building a security keypad, you might want a simple layout with a 0-9 number pad, and maybe a few additional keys for functions like “Enter” or “Clear”.
Consider also the physical layout. A typical layout for a numeric keypad is a 3×4 grid, with each row having three buttons, and there being four such rows.
2. Size and Number of Keys: The next step is to figure out the size of the keys and how many you’ll need. This again will depend on the application. A security keypad, for example, would typically have about 12 keys. However, an industrial machinery control pad might have many more, including function keys.
The size of the keys will impact the overall dimensions of your keypad. The keys need to be large enough to be easily pressed but small enough to fit the required number into your layout. Also, consider the space between keys, often referred to as the pitch. A larger pitch can make the keypad easier to use but would require a larger overall size.
3. Creating a Circuit Schematic: With a clear picture of the keypad layout, you should now design a circuit schematic. This is a diagram that shows how the electrical components of the keypad will be interconnected.
You’ll need to decide what kind of microcontroller or other hardware you’ll use to read the button presses, and then figure out how you’ll wire the buttons to that microcontroller. A common method for doing this with many buttons is called a “matrix” layout, where rows and columns of buttons are wired together in such a way that a microcontroller can read multiple buttons with fewer I/O pins.
Remember, the circuit design must be compatible with your chosen microcontroller and the rest of your system.
There are many software tools available to help with this step, including free ones like Fritzing, and more advanced paid options like Eagle or Altium. These tools can also often help you when you get to the stage of actually creating a PCB (Printed Circuit Board) from your design, should you choose to do that.
Keep in mind the waterproofing aspect while designing. For instance, avoid having components or connections on the surface of the PCB where they would be exposed to water.
Also, remember to plan for how your keypad will physically connect to the rest of your system. Are you using a wire with a connector? If so, what type and how will it be waterproofed? Or are you connecting directly to the rest of the system? If so, what are the mechanical and waterproofing considerations there?
By carefully considering each of these steps, you can ensure you design a keypad that meets your requirements and will be reliable in use.
Construction of Keypad
Constructing a keypad involves several stages, which include assembling the PCB, integrating the keypad module, attaching the buttons, connecting the microcontroller, and testing the assembled circuit. Let’s delve into these steps in more detail:
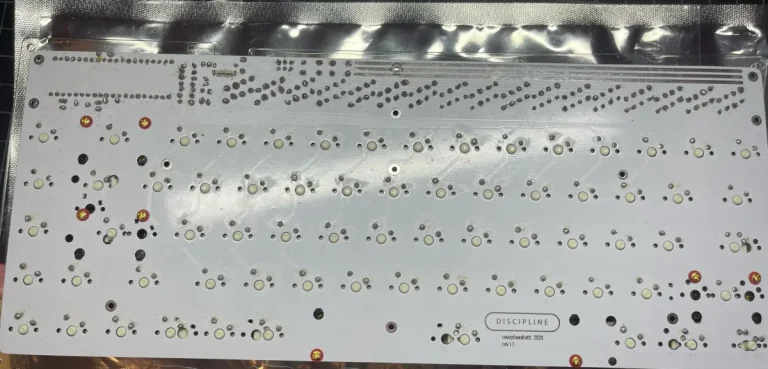
1. Assembling the Printed Circuit Board (PCB):
Assemble your PCB following the schematic you designed earlier.
a. Placement of components: Start by positioning your components on the PCB according to your schematic. This usually includes things like resistors, capacitors, IC sockets, and any other components that your design calls for. You may also have components such as diodes or LEDs for feedback, depending on your design.
b. Soldering: After positioning your components, it’s time to solder. Make sure your soldering iron is hot before you start. Apply the iron to the component lead and the pad simultaneously and then apply the solder. The solder should flow onto the lead and pad and not onto the iron itself. Repeat the process until all components are securely soldered onto the PCB.
2. Integrating the Keypad Module:
The next step is to integrate your keypad module with the PCB.
a. Placement: Place the keypad module on the PCB such that the pads on the module align with the corresponding pads on the PCB.
b. Soldering: Solder the module onto the PCB.
3. Attaching the Silicone or Rubber Buttons
Now it’s time to attach your buttons. These will be rubber or silicone buttons that are waterproof and durable.
a. Positioning: Place the buttons over the keypad module, aligning each button with its corresponding pad on the module.
b. Attachment: Depending on your design, the buttons may be self-adhesive, they may snap into place, or you may need to apply a suitable adhesive.
4. Connecting the Microcontroller
The microcontroller is what will read the state of each of the buttons and convert that into a digital signal that the rest of your system can interpret.
a. Placement: Position the microcontroller on the PCB.
b. Soldering: Solder the microcontroller’s pins to the PCB, ensuring that it connects properly with the rest of your circuit.
c. Connecting to the keypad: Wire up the microcontroller to the keypad according to your design. This will often involve connecting the rows and columns of your keypad to the digital I/O pins of your microcontroller.
5. Testing the Assembled Circuit
Before moving on to the waterproofing, you need to test your assembled circuit.
a. Visual Inspection: Start by doing a visual inspection. Make sure all components are soldered properly and that there are no apparent shorts or open circuits.
b. Continuity Test: Use a multimeter to perform a continuity test on the circuit. This will ensure that the electrical connections are properly established.
c. Functionality Test: Connect the circuit to a power source and test the functionality of each button on the keypad. When you press a button, the corresponding circuit should activate, and the microcontroller should read the correct button press. You can usually use a simple test program on the microcontroller to do this.
Note: The above steps assume that you are using a custom PCB and keypad design. If you are using a pre-made keypad module (which is a common and simpler approach), the steps will be somewhat simpler and will involve connecting the pre-made keypad module to the microcontroller and mounting it in a suitable case.
Making the Keypad Waterproof
making the keypad waterproof involves several crucial steps. You must protect the electronics, apply waterproof sealing, and prepare the waterproof enclosure. Here’s a step-by-step guide on how to do this:
1. Applying Waterproof Coating to the PCB
a. Preparation: Make sure the PCB is clean and dry before application. You can use a PCB cleaning solution to ensure no residual flux or contaminants are present on the surface.
b. Application: Apply a layer of waterproof coating to the PCB. This is typically a conformal coating material, which is a thin polymeric film designed to protect the electronic circuits from harsh environments. The coating can be applied by spraying, brushing, or dipping, depending on the type of coating used. Ensure the coating covers all exposed metal and electronic parts.
c. Drying: Allow the coating to dry as per the instructions given by the manufacturer. It could take several hours to a few days for the coating to fully cure.
2. Applying Waterproof Sealant to Connections
a. Preparation: Identify all the external connections, such as the wires that will connect the keypad to the rest of your system.
b. Application: Apply a waterproof sealant, such as silicone sealant, to these connection points. Ensure that the sealant covers the entire connection and a small area around it.
c. Drying: Allow the sealant to dry. The time will depend on the specific product used, but typically it can be from a few hours to a day.
3. Fitting the Assembled Keypad into a Waterproof Enclosure
a. Choosing an Enclosure: Select a waterproof enclosure that can accommodate your keypad. This should be rated with a suitable IP (Ingress Protection) rating for the level of water and dust protection you need.
b. Installation: Install the keypad into the enclosure. This will typically involve screwing the PCB into the enclosure using mounting holes in the PCB and the enclosure.
c. Sealing the Enclosure: Apply a waterproof gasket (usually included with the enclosure or purchased separately) between the enclosure and its lid to create a seal. Then, close the enclosure, making sure it is secured and locked tightly.
4. Waterproofing the Keypad Buttons
a. Selecting Buttons: The buttons should be made of a waterproof material such as silicone or rubber.
b. Installation: The buttons should be mounted in such a way that they form a seal with the enclosure. This might be achieved by having the buttons molded as part of a single sheet of silicone, which can then be sealed against the enclosure.
Testing the Waterproofing
Once you’ve completed the waterproofing, it’s important to test it. Begin with a visual inspection, checking for any visible gaps or defects in the seals. Then, you can test the waterproofing by lightly spraying water on the keypad and checking for any leakage. Remember not to directly expose the device to heavy water flow or submerge it in water unless it’s designed for that level of waterproofing.
Remember to always follow safety measures while conducting these tests. If your keypad fails the test, identify the leak’s source, correct the issue, and retest until the waterproofing is successful.
6. Troubleshooting
In case of any problems, perform a systematic troubleshooting. This may involve checking the soldered connections, ensuring the sealant is applied properly, or checking the waterproof casing for any leaks.
Always remember to follow safety precautions when dealing with electronic components and when testing the waterproof capability of the keypad.
7.Conclusion
In conclusion, the construction of a waterproof keypad involves meticulous planning, careful selection of components, attentive assembly, and diligent waterproofing measures. This comprehensive guide provides you with an understanding of the steps needed to create a resilient, waterproof keypad, starting from the design phase, proceeding through the construction phase, ensuring effective waterproofing, and finally, conducting rigorous testing.
The final product is a versatile tool that can withstand exposure to moisture and water, suitable for various real-world applications, from marine and outdoor environments to industrial settings. This project not only underlines the practical application of electronics but also the importance of robust design to face environmental challenges. The process invites creativity, problem-solving, and continual learning. Although this guide provides a comprehensive pathway, always remember that there’s room for innovation and customization according to specific needs and constraints.
We hope that you found this guide helpful and we encourage you to keep exploring and enhancing your skills in electronics. Creating a waterproof keypad is just the beginning – there’s a whole world of possibilities out there waiting to be discovered!


